Laneige Water Sleeping Mask review and a drugstore dupe

I recently got my hands on the Laneige Water Sleeping mask. This mask has been really popular , has great reviews and I have seen it in a lot of social media posts. The moment I tried it, it remained me of a product that I already have in my bathroom cabinet and have been using for a little over 2 years now. It is the Freeman Gel Cream Mask. I wanted to write a post about the similarities and the differences between both masks.

What they claim:

LANEIGE Water Sleeping Mask- Purifying + Moisturizing

Purchase here- https://rstyle.me/cz-n/f6grmbc5s47

An overnight , moisture-recharging gel mask that quickly absorbs while you sleep to deeply hydrate your skin. It is formulated with hydrolyzed mineral water to deliver high doses of moisture to parched skin.

Suitable for ALL SKIN TYPES

Formulated without

-parabens

-pathalens

Not tested on animals

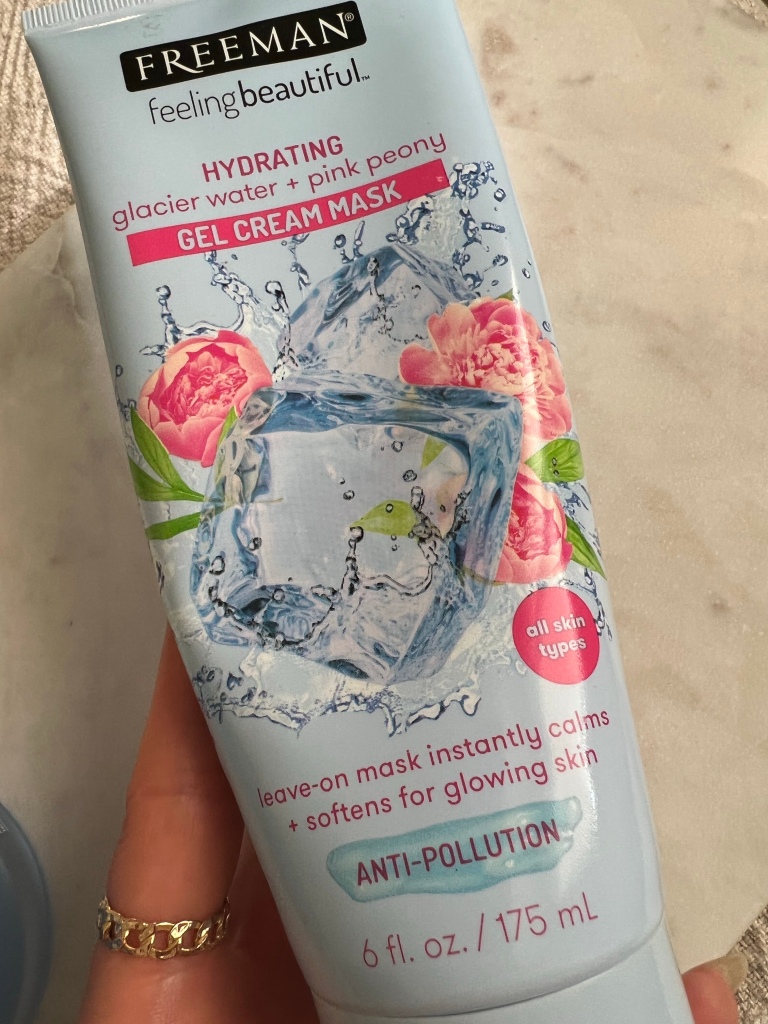
FREEMAN Gel Cream Mask – Hydrating + Anti-Pollution

Purchase here: https://rstyle.me/cz-n/f6qymcc5s47

Lightweight leave-on gel cream mask that boosts hydration and protects from environmental pollution.

Refreshing Glacier Water replenishes dry skin + Pink Peony delicately calms for petal soft skin.

Suitable for ALL SKIN TYPES

Free of harsh chemicals

Cruelty Free

Both masks have similar texture and color, just a slight difference in the blue shade that they both have. But the gel like consistency feels and applies the same. They both give you a wet like finish and I have to use pretty much the same amount of each to cover my whole face ( a little goes a long way for both). There is a slight difference in the scents but both have a light and soft scents. The laneige claims that the fragrance in their mask is supposed to calm you and give you a more restful sleep. This is hard to detect and I am not going to focus on that since I doubt anyone will purchase the mask for this particular reason lol.

Laneige on the left// Freeman on the right

The Lanaige one is meant to be used as a last step in your night time skincare routine and is suggested to go on top of your moisturizer. And be left overnight.

The Freeman can be used for 10-15 minutes, all day or overnight.

I apply both masks after I remove my makeup and wash my face at the end of the day. I apply them straight on my clean and dry face but you can apply face cream or/and serums before that and use the masks as a last step treatment to lock everything in and add that extra hydration.

The laneige one sinks in the skin leaving a slight film that doesn’t feel sticky or greasy.

The freeman mask stays on wet and a bit stickier for longer but it doesn’t go on my pillow it rather stays on my face. I also want to mention that I have switched to silk pillow cases and they make a huge difference in my evening skincare habits. The silk pillow case doesn’t absorb products as a cotton one would. This way the products I invest in stay on my face and don’t end up on my pillow. With the Freeman mask I wake up and still have product on my face as opposed to the Laneige which by the morning would have sank in my skin completely. Which makes the cheaper mask a bit more hydrating for my needs.

After I rinse off my face in the morning both masks leave my skin supple, soft and hydrated.

It is not solely an overnight treatment. The instructions suggest to use it during the day for 15-20 min or overnight depending on your skin and the result you are looking for. Since my skin has been really dehydrated I like to leave it overnight. But I like to use the Freeman after I use a clay or any cleaning mask that is supposed to draw impurities out. Those masks usually leave my skin feeling super tight and I like to follow with the gel cream mask for 10-15 minutes to bring back my skin’s natural moisture. I also always take it with me when I travel. I like to transfer ta bit of this mask in a smaller container (they also offer travel sized packets) and take it with me especially on overnight flights. We all know how the dry air on the plane sucks the life out of our skin and this mask has saved me multiple times. I apply it once I get on the plane and leave it on through the whole flight. It is more inconspicuous than a sheet mask so I don’t have to stress about the person sitting next to me. I land at my destination with soft and glowing skin.

Both masks are a great choice for someone that likes to pamper themselves. If you like spa like experience at home and you are into skincare definitely add either of those to your beauty routine. They are a quick fix for skin that looks tired and parched. You will get an instant smoothness and hydration, brighter complexion and some plump to the face that will smooth out fine lines.

The winner for me is the Freeman because it is a bit more moisturizing and so affordable, also comes in a giant tube. But if you prefer more luxurious products and you like to shop higher end skincare the Laneige will be a better choice for you.

Get Freeman here – https://rstyle.me/cz-n/f6qymcc5s47

Get Leneige here – https://rstyle.me/cz-n/f6grmbc5s47

Get Silk Pillowcases here – https://rstyle.me/+3hEOp2Okt5DYI8CG-sv1qQ

How To do gel nail polish and not damage your natural nails for beginners

This summer I really wanted to have trendy long nails. Got some pic inspo from Pinterest and headed to the nail salon super excited. I wanted almond shape and had a nail polish combo in mind too. I got poly gel extensions and omg… totally different from my expectations they looked ugly. I was so bummed! I can’t tell you how disappointed I was. They looked so FAKE. I haven’t had fake nails so I didn’t know what to ask for and tell the nail tech how to correct it. So I embraced the result and stuck with it for 2 weeks. I thought they will grow on me, but didn’t happen.

I know that some nail tech are good at mimicking that natural nail look but honestly every time I get my nails done I am regretting it afterwards. My gel polish would either peel off the first week or my nails would not be to my desired look. So that time I took a decision to grow out my own nails once I get those fakes off. I wanted natural looking long nails and in my mind my only option was to just get my natural nails grow out.

Ever since that growing phase started I got into gel nail polish. I like that it lasts longer and looks shiny and fresh until the end as opposed to regular nail polish that looses the shine and stars chipping way faster. But the main thing for me is that it makes the nails thicker ( I mean temporarily, only while you have it on. Not a long term fix)and provides that extra support for my natural long nails. It is what helped me grow them out. Because while I have it on, my nails are more break resistant and I don’t pick on them, which lets them grow. And even if it is a bit more damaging than regular nail polish I have mastered the technique by now and I keep the damage to a minimum so I can still have strong nails underneath the gel.

And here I will share my tips to do gel nail polish at home and it will be really helpful if you are a beginner. This is based on a lot of error and trial, techniques I picked up from professionals and a lot of research on google.

First thing is get a gel polish starter kit. Plenty of them on Amazon and very affordable. They come with all the necessary polish steps and a lamp. This way you don’t have to stress about what to get. Once you master the process you can go ahead and upgrade and buy individual polishes or base and top coat by your liking and needs.

https://rstyle.me/cz-n/f4ny94c5s47 this one has a nice range of colors and a lot of other tools and goodies that you might get a use of in the future.

Gel nail polish is very different from regular nail polish. It requires some prepping of the nail and steps that you should not overlook.

After you do your basic mani steps and take care of your cuticles by pushing or cutting them, the first and crucial step is removing the shine off the nail. If you skip this step your polish will peel right off on the second or third day. I use a very fine buffing file and gently swipe it all over my nail. Making sure I get the part around the cuticle. This is usually the part where gel nail polishe starts to lift and then get caught in your hair or clothes and it gets super annoying and your manicure is going to its end.

Polishing file https://rstyle.me/+Fiu1WhrD9EBJiqP7h231Mw

STEP 2 use alcohol and a lint free wipes to remove any oily residue from the nails that can affect the longevity of your manicure.

Lint free wipes https://rstyle.me/+Fiu1WhrD9EBJiqP7h231Mw

STEP 3 use a nail primer (should be included in the kit). It gets your nail to the right pH level to prep it for the polish. You don’t need to cure after this step. Just wait for 1-2 min after application and move to step 4.

STEP 4 apply one coat of base and cure for 60-90 seconds. The curing time depends on the lamp you are using. Most of the lamps in those not professional starting kits are not really strong. So adjust the time of curing accordingly. Start with 60 seconds and add more if the polish hasn’t hardened.

If after you have cured it you feel you have a lot of sticky residue you can wipe the nail with alcohol and lint free wipe. You can repeat this process after each layer. Sometimes lint pieces get stuck on the sticky surface and it can ruin the appearance of the layers applied afterwards. I also recommend doing one hand at a time. Paint/cure / paint cure until finished and then move to the other hand.

STEP 5 apply a coat of desired polish color. I personally don’t like the look of really thick gel polish so I try to do thin layers. I place a dot a little bit over my cuticle and then spread the polish around. Trying to not go over the cuticle. I always get some polish over my skin and cuticle but I use a tiny brush dipped in nail polish remover to go around the cuticle area and clean the mess BEFORE I cure.

I always do at least 2 coats. Depending on the color and the desired result I may go over with a third one.

STEP 6 apply top coat and cure.

STEP 7 clean the sticky residue with alcohol and apply cuticle oil.

Repeat on the other hand.

Voila!

My manicure usually lasts about 2-3 weeks. Most of the time I take it off after 2 and a half weeks before it even starts chipping because I don’t like the look of grown out nails.

Removal process is also very important so I don’t want to leave this out of the post. If you don’t do this right you can really cause damage to nails in the long run.

The best way I found is to use 100% Acetone! Even though pure acetone is believed to be damaging to the nails I feel that using milder nail polish removers can cause more damage. You won’t be able to remove it easily and you have to really scrape and pull the gel polish and this can really remove layers of your nail. And it can be painful as well. So by applying cotton rounds soaked in acetone and wrapping foil around each nail the gel gets really soft and easily slides right off the nail.

If you are concerned about the health of your nails. Leave them bare for a couple of days and use a nail strengthener in between your gel manicures. I love this one by OPI https://rstyle.me/cz-n/fub5gwc5s47.

Thanks for stopping by!

Here I experimented with some nail art
This are my natural nails with gel polish

Favorite Winter Self Care Activity

There is something so soothing, relaxing and stress relieving in a long bath on a winter evening after a stressful day.

To be honest I wasn’t into baths before. Somehow it felt like torture to sit there and try to relax. I tried to listen to chill music, watch something I enjoy but my mind would constantly run and I couldn’t wait to get out of it and move to the next task. I started to get into the relaxing self care activity when I really got my mind off of everything and just started to be present in the moment. Reading a book is what really helped me get into that mode. And now it is a full ritual for me. I use epsom salt that I mix with a few drops of essential oils before I throw it into the water. Mixing the two together ensures the oils won’t just sit on top of the tub but will rather infuse the water .Depending on my mood I choose between lavender , peppermint and/or rosemary, when I need to calm my mind and relax my body. Citrusy like grapefruit, sweet orange and/or tangerine when I need more of uplifting energy. I light up a favorite candle and pour a glass of rosé! I also use oil diffuser to further add some aromatherapy touch.

I like to use the time to apply a face mask since the steam opens up the pores and makes it a great time for that . Lately I have been doing moisturizing masks just to combat my dry winter skin. And then I just enjoy this precious me time for about 30-35 minutes.

What is your favorite self care activity?

Here I want to leave some essential oil combinations that you can try either in your tub or in your diffuser.

  • Grapefruit essential oil
  • Lemon essential oil
  • Lavender essential oil
  • Pine needle
  • Grapefruit
  • Peppermint
  • Eucalyptus
  • Peppermint
  • Rosemary
  • Lavender
  • Lemon

Holiday 2021 Gift Guide for Her

It’s gift season again! If you are stuck with what to get your loved once this holiday season check my selection of items that could make a great gift. Some of them are on sale now so hurry up!

Le Creuset Pot https://rstyle.me/cz-n/fcjndyc5s47

Ugg Classic Slippers https://rstyle.me/cz-n/fzssipc5s47

Revlon Hair Volumizer Brush https://rstyle.me/cz-n/fzsqq7c5s47

Jo Malone gift set https://rstyle.me/cz-n/fchujic5s47

Knit Blanket https://rstyle.me/cz-n/ftjchcc5s47

Warmer Coffee Mug https://rstyle.me/cz-n/fchujic5s47

Dyson Air Wrap https://rstyle.me/cz-n/fcjkuac5s47

Dyson Hair drier https://rstyle.me/cz-n/fcjkz8c5s47

YSL Perfume https://rstyle.me/cz-n/fchvt3c5s47

YSL lipstick https://rstyle.me/cz-n/fzsumsc5s47

Tom Ford Coffee Table Book https://rstyle.me/cz-n/e7ste9c5s47

AD Coffee Table Book https://rstyle.me/cz-n/fchrikc5s47

Kitchen Aid Mixer https://rstyle.me/cz-n/fzsqzjc5s47

Glossier Serum Set https://rstyle.me/cz-n/fzssbrc5s47

Thanks for stopping by ❤️

I hope my selection helps you!

Have a very happy holiday season,

Xoxo Ivelina

Weleda Skin Food Review and how to use it to get glowing skin

I want to review a product that I have been obsessed with since I got it and it has been my savior for winter dry skin. I have very dry skin when temperatures drop and it not only looks ashy and ugly but also very uncomfortable and itchy. Living in Arizona where there is not much humidity year round has made this condition worsen over the years. Usually it is my body and hands that feel the worst but recently I have been expecting dryness around my face too.

I have tried many products that are meant to deeply moisturize but nothing was giving me the needed result. Most of the products will sink in immediately leaving my skin soft and hydrated only for a brief moment. Some moisturizers would leave a greasy film on my skin and still not provide the relief I need.

When I started waking up with dehydrated, red face that felt tight, showed all the fine lines around my eyes and made me look tired I knew I needed more than a moisturizer, something heavy duty.

I came across Weleda Skin Food. And I am obsessed! I think this will be a staple for me year round.

I will start by saying that this is a very rich cream meant to be used anywhere on your body. It is supposed to heal dry and rough skin. Some people say it is a body product but I have been using it on my face and haven’t had any issues. And their description on the back says “ whole body” which to me doesn’t exclude the face.

It would not be a product to replace your daily moisturizer. I consider it a multi-purpose healing balm kind of product.

It has very thick and a bit sticky consistency. It feels like wax, vaseline and cream mixed together. When you warm it in your fingers though it starts melting and gets a bit lighter and easier to apply. The smell I detect is really light and flowery, a bit of lemon peel with sweet notes, but also has a natural product smell. The smell of beeswax and natural oils.

or Amazon https://rstyle.me/cz-n/fwphygc5s47

It is paraben free
Phthalates free
No synthetic preserves and fragrances
No animal testing

TIPS on How To use it:

I use it mainly on my hands and my face. And I mainly use it in the evening.

I do my evening skin care routine. Wash my face apply my serums, moisturizers and all that I normally do. This doesn’t replace any of my facial products. I use it on top of everything to seal it in and get the extra hydration and protection from this product. I warm a little bit (a pea size) of the cream in my fingers and gently apply under my eyes, around my mouth and on my cheeks. It feels sticky and it doesn’t sink in right away, it provides a barrier and seals in all the other products. It for sure goes on my pillowcase since I go to bed like a greasy ball but doesn’t show any oily stains. In the morning my skin feels way more supple, radiant and soft. The hydration that this product leaves makes my fine lines plumper and they are not that noticeable. Also that tight feeling that I use to have is gone!

I am just in love with this product and will be using it year round. Especially around my eyes to make sure this area is well moisturized so I can slow down wrinkles and fine lines.

Purchase from Target https://rstyle.me/cz-n/fwphsfc5s47

or Amazon https://rstyle.me/cz-n/fwphygc5s47

How to fight winter dry skin

Skin that starts getting dryer and dryer as temperatures drop is not only unattractive but could be very uncomfortable. And I am not talking about light feeling of dryness but the one that makes you itchy, gives you that burning feeling , red bumps and patches appear on your body and you just don’t know how to deal with it because you have tried every product that promises deep hydration but nothing seems to work.

As someone that has sensitive skin that gets super dry in the winter I can tell you it is always a struggle for me to get through those winter months. But with a lot of trail and error I now manage to get my skin to somewhat healthy state and relieve all the uncomfortable issues that usually arise during that time of the year. It is this very simple routine that has been working with great results and I am here to share.

First I want to start with what you should be avoiding or minimizing in order to keep your skin’s natural moisture under control. Hot showers and bubble baths are unfortunately your enemy. I know a nice, long bubble bath when it’s cold outside sounds amazing but the hot water and the artificial ingredients in the bubbles could really worsen the health of your skin. If you really want to pamper yourself with a relaxing bath though, use Epsom salt, baking soda, essential oils and coconut oil instead of bath bombs or bubble gel, and fill the tub with lukewarm water. (Skip the pink bubbles for some other time.)

One very beneficial thing that you can do for your skin is exfoliating! Even though you might be skipping this step just because your skin feels sensitive and you are afraid to irritate it but the importance of exfoliating is still in effect as any other time of the year. I feel like most of us tend to exfoliate our bodies in the Spring and Summer when our skin is more exposed and we feel the need to have that smooth, silky skin. And then Winter comes we bundle up and kind of put this extra step away . But it is still an essential step for the health of our skin . Our skin renews daily and sheds the old cells, some of those loose skin cells might be washing away in the shower but a lot of them just get trapped on the surface, causing clogged pores, uneven dry patches and affecting our detoxification through the skin. Sloughing off those dead skin cells will not only diminish the look of that ashy skin but will make the products used afterwards penetrate deeper and do their magic.

The exfoliation in the winter should be a little bit more gentle though.

I stay away from rough exfoliating mitts that I usually use to remove old fake tan, also keeping my hands off very abrasive products. Dry skin brushing is my number one way to exfoliate year round plus it has all other kind of benefits. And doing it after a long day in a chilly winter evening actually feels so good and relaxing because it warms your whole body up and helps minimize the stress. Try to find a natural soft bristle brush and use gentle upward strokes or small circles. It helps brush away skin that is dead and dry , leaving fresh skin, unclogging the pores and making the moisturizer applied later go on smoother. Another reason this is my exfoliating method of choice is because it doesn’t involve any artificial products that tend to irritate my already sore skin even more.

get a body brush here: https://rstyle.me/cz-n/fx4hxhc5s47

Next I am very carful of the products I use to clean my skin. For my body I use a paraben free shower gel and try to stay away from highly fragrant products. Same goes for the face. A mild cleanser that doesn’t sud and doesn’t leave my skin feeling tight is what I look for.

I am currently using shower gel by Bondi Sands that I find is mild enough to do the job. It has Ph balanced formula that is gentle on the skin and fortified with Aloe Vera and Coconut.

get the body wash here: https://rstyle.me/cz-n/fuj5a5c5s47

And for my face I use Evoluderm wash that is creamy and non irritating. This french brand is very inexpensive and of a really high quality. I get it at Marshalls. Couldn’t find the same one online but here is another one that’s in my rotation.

get mild face wash here: https://rstyle.me/cz-n/fs9e8nc5s47

Moisturizing is what makes the uncomfortable itchy feeling go away. This is the step I never skip!

I will share my holy grail moisturizing products . And I have tried a lot. I find many of the high end brands feel luxurious and smell nice but don’t really give me that moisture and relief I need. So I use a drugstore, affordable, tried and tested products. Nivea Original Body lotion is the one that really hydrates my body and keeps it nice and moisturized for long. Not only it makes the tight skin feeling go away but it gives a nice glow to the skin making it appear healthy and glowing.

get the body lotion here: https://rstyle.me/cz-n/fx4jmqc5s47

And for the face is a bit different story, especially during the day. If you wear makeup, it’s hard to combine it with very heavy moisturizer .But you do need to change your face skincare according to the season. If you are still using that gel like moisturizer that you loved a month ago and wondering why your skin feels rough?? Time to put it away! Afraid to get oil based serums because you are prone to breakouts? Get something that is lightweight but has moisturizing properties, something that is fragrance free and oil free.

I love this one from First Aid Beauty https://rstyle.me/cz-n/favy2yc5s47

It is face and body moisturizer, doesn’t really moisturize my body enough but works great on my face. Feels really light , goes well under makeup and gives me enough moisture during the day.

And at night is when I like to add extra moisture especially on my face. The last step in my skin routine is Weleda Skin Food. It doesn’t replace my moisturizer or any of my skincare products. I usually use it as a last step after my serums/oils and moisturizer to seal everything in. It is a very rich cream that acts like barrier and doesn’t let all the moisture added with other products evaporate. I would highly recommend this product especially if you sleep in heated room that usually makes the air extra dry and this affect the health of the skin in a negative way.

l use a very small amount of the cream, warm it up in between my fingers and gently tap around my eyes, my mouth and a bit on the cheeks. This cream is multi purpose and great for the whole body so I sometimes use it on my hands and any other part I need extra help.

get Welda Skin Food here: https://rstyle.me/cz-n/fwphsfc5s47

A little reminder to drink plenty of water to hydrate inside out and don’t forget the use of SPF on all areas that are exposed.

And one last thing is invest in a humidifier. It is a great way to add humility that leaves your home the moment you turn the heater on. It’s beneficial not only for your beauty but your health as well.

get a humidifier here: https://rstyle.me/cz-n/fx4j9cc5s47

At home manicure step-by-step | Nude nails with swirl nail art

I posted a video on my YouTube channel where I am showing you how I do my nails at home. I did this DIY trendy nail art with swirls . I am nowhere near professional but I like to DIY my manicure because it saves me time and money. I hope this step-by step tutorial inspires you to do your mani at home as well . I had poly gel extensions for a bit and remove them and my nails are really damaged and thin . I am giving them a break from gel nail polish so I am doing regular nail polish.

It is very nice to just go and get your nails done at the salon but honestly every time I get mine done the polish would either chip the next day or I would get those fake looking nails. Probably it is just me that I haven’t found a good nail tech but last time I got some gel extensions they looked so fake that I started fixing them myself and I got way better results.

Watch my YouTube video where I show you this DIY trendy nail art with swirls. It is not perfect but I like that it looked unique and hand drawn. Just like art 🙂 I feel anyone can do this, just use a light hand and don’t stress about it.

Products used:

Nail Buffer – https://rstyle.me/cz-n/fub54ec5s47

Nail File – https://rstyle.me/cz-n/fucdwyc5s47

Cuticle Pusher – https://rstyle.me/cz-n/fub6rrc5s47

Cuticle Nipper – https://rstyle.me/cz-n/fub6d5c5s47

Primer – https://rstyle.me/cz-n/fub5trc5s47

Nail Polish Thinner – https://rstyle.me/cz-n/fucm5vc5s47

Nail Polish ( nude) – https://rstyle.me/cz-n/fub5wbc5s47

Nail Polish ( white ) – https://rstyle.me/cz-n/fub5yzc5s47

Nail Art Brushes – https://rstyle.me/cz-n/fucm7hc5s47

Top Coat – https://rstyle.me/cz-n/fub5mwc5s47

Cuticle Oil – https://rstyle.me/cz-n/fub6m3c5s47

Moisturizing Cream – https://rstyle.me/cz-n/fuceauc5s47

Beauty & Wellness things that can boost your confidence and make you feel better

Some days or even weeks can be just blah. Nothing excites you , you feel a bit depressed and drained and you just don’t want to do anything. It is okay to let your emotions control you once in a while and just spend some time with yourself . Moments like this can be recharging but also put a toll on your overall well being and confidence.

Here I will wrap up some of my favorite mood and confidence boosting beauty and wellness things that I like to incorporate in my life especially after a bad week that made me feel and look like a train wreck.

Workout

Anything works here. The sweatiest the better. It has been proven by science many times that any physical activity releases hormones of happiness. It will get you nicely tired and can give you a better and restful sleep at night. Which on the other hand can make you feel and look way better. And also when I feel my muscles sore it makes me feel more toned and defined right away. I know that this is just my brain tricking me but it makes me feel sexier and more confident. You should definitely incorporate a workout when you feel stressed and depressed. If that is not for you go on a hike, try biking or jogging . Being outside will also have positive impact on your mood. Whatever you choose, move your body and try to push yourself a little bit out of your comfort zone.

Even if it’s just 20 min . The moment you step into choosing yourself and showing up for you, a lot happens for your confidence, your trust and your love within yourself.

Manicure

Getting a fresh manicure will instantly make you look polished and fancy. Even though maybe not a lot of people will notice the style of your manicure or the color choice it just makes other people see you as put together. A person with done nails will give the vibe of a strong and classy personality, as opposed to the person with chipped nail polish, missing nails, rough cuticles will give a negative vibe as I just woke up, not motivated to do anything. And the way other people perceive you will affect the way they treat you which on the other hand can boost your confidence .Even if you don’t like nail polish or your work environment requires you to have bare nails you can still get a mani to give your nails more polished and clean look.

By the way I love doing my own nails as it is therapeutic for me

Pedicure

This sounds very similar to the previous one but not really. I feel it is even more important. Pedicure is definitely something you do mostly for yourself, especially in the colder months. It still makes you look better but what mostly matters here is the way something as little as this can make you feel. It can give you that feeling of “I am ready for anything” and “I got everything under control “.

Get a fake tan

I feel like when I loose that summer glow my pale skin makes me look tired even when I am not. Go explain everyone you had enough sleep when you look pale and washed out. Once I apply some self tanner I right away look more toned, fresher , more youthful and it right away makes me feel like a new , sexier version of myself.

Whiten your teeth

Bright smiles goes a long way! It’s an easy way to make yourself feel good in an instant. I like this 5 minute gel https://rstyle.me/+_ORLJjv3Bc5v4J0RQbbxXw that is super inexpensive and doesn’t make my teeth sensitive and 10-15 minutes is usually what it takes to notice a difference.

Water

Drink plenty of H2O! It might sound irrelevant but when you stay well hydrated you help your body get rid of toxins which can have all kinds of negative influence on your body and mood. I have noticed when I drink adequate amount of water my skin shows it up right away. It makes my complexion clear and glowing and that’s a mood booster for me right there. I also like adding citrus or cucumber to my water to give it a more desirable taste.

How to get baby soft feet at home | How to DIY Pedicure Tutorial

Check out my latest YouTube video on how I do my pedicures at home to get perfect looking feet every time. It is a spa like relaxing pedicure routine and I hope you enjoy it 🙂

PRODUCTS THAT I USE:

Bondi Sands Shower Gel – https://rstyle.me/cz-n/fuj5a5c5s47

Exfoliating Glove- https://rstyle.me/cz-n/favzf6c5s47

Exfoliating Scrub- https://rstyle.me/cz-n/fuj48wc5s47

Nail Clipper- https://rstyle.me/cz-n/fuwhbgc5s47

Nail File- https://rstyle.me/cz-n/fucdwyc5s47

Sally Hansen Cuticle Removing Gel- https://rstyle.me/cz-n/fuj5e5c5s47

Cuticle Pusher- https://rstyle.me/cz-n/fub6rrc5s47

White Nail Polish- https://rstyle.me/cz-n/fub5yzc5s47

Moisturizer- https://rstyle.me/cz-n/fuceauc5s47

Moisturizing Balm- https://rstyle.me/cz-n/fuwgxjc5s47

Top Coat – https://rstyle.me/cz-n/fuv8bsc5s47

Nail Dryer Spray – https://rstyle.me/cz-n/fuj5dvc5s47

Sale Alert from Alo Yoga

I am so excited that this bundle from Alo Yoga is on sale right now. It’s everything you need for a pilates or yoga class. They named it the Ultima Home Studio Set but I better be seen with it. So cute and so many colors to choose from. I’ve been eyeing it for a while now and I would like to grab one for myself. But also with the holidays approaching this can make a great gift for the workout addict.

I am torn between the pink and the black set ,oh it’s so hard to pick one . Which one would you choose?

The Ultimate Home Workout Set – https://rstyle.me/cz-n/fuh4tfc5s47

And if yo spend $250+ on the website right now you can get the signature Alo yoga tote for free.

The ultimate workout set – https://rstyle.me/cz-n/fuh4tfc5s47

The ultimate workout set- https://rstyle.me/cz-n/fuh4tfc5s47

The ultimate workout set – https://rstyle.me/cz-n/fuh4tfc5s47
The ultimate workout set- https://rstyle.me/cz-n/fuh4tfc5s47